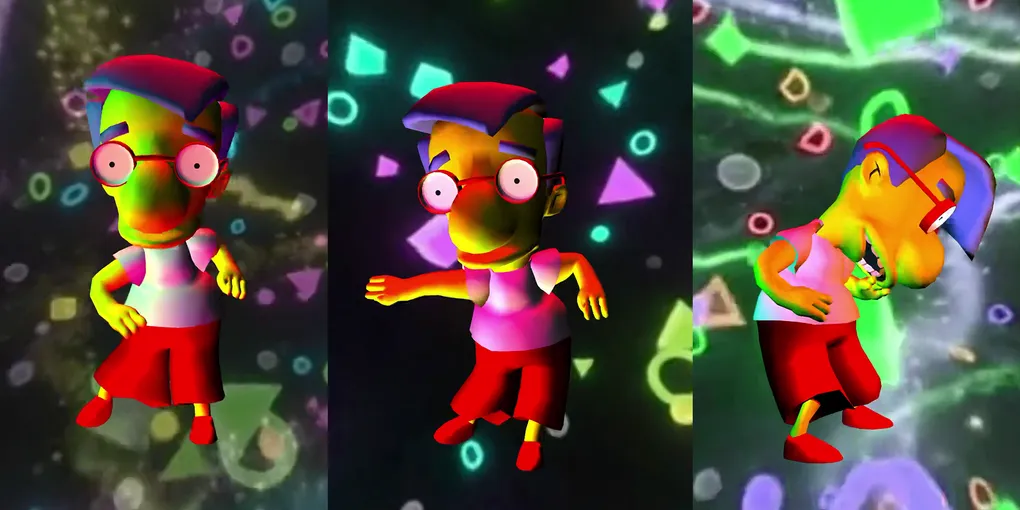
Make Milhouse Gorgeous in TouchDesigner
If you found your way here from the video, welcome! This is the companion post with all the detail that doesn’t fit in a two minute video, plus every link you need to go do this yourself.
The big idea
Here’s the thing: your FBX file doesn’t have PBR materials in it. The FBX format’s entire material vocabulary is Lambert and Phong. So when you drag an FBX into TouchDesigner and it comes in looking flat and sad, nothing is broken. The importer built you a Phong MAT because that’s all the file could describe.
Upgrading that phong to a PBR is very worth it, because phong and PBR are fundamentally different ideas:
Phong is a recipe for an appearance. It tells the renderer what the light should look like: make a specular dot, make it this tight, tint it this color, etc.
PBR is an ingredient list. Physically Based Rendering tells the renderer what the surface is: this material is 60% rough, it’s not a metal, here’s its base color.
The payoff is that this allows the material to respond more like an actual surface in the world. Change the lighting in a PBR scene and the material responds correctly.
The recipe (the short version)
- Dive into your FBX node and find the Geometry node inside. Don’t freak out about all the other stuff in there.
- Inside the Geometry node you’ll find a color map, a mesh, and a phong material. (Your mileage may vary. All FBX files are unique snowflakes.)
- Replace the phong with a PBR MAT and make sure the new material is actually assigned to the geometry.
- Add a Substance TOP and point it at a
.sbsarmaterial file. Drag the Substance TOP onto the PBR MAT and it wires up every map: base color, roughness, metallic, all of it, automatically. (And no, you don’t need any Adobe software for this. The Substance engine is built into TouchDesigner. Adobe’s tools are for making.sbsarfiles, not using them.) - Add an Environment Light with an HDRI as its environment map. This is the moment Milhouse goes from dark and sad to gorgeous.
- Rotate the environment map until he’s looking supa hot. (This hotness is subjective)
- Optional: grab the original color map from inside the FBX node and assign it as the Base Color Map on the PBR MAT to bring back some original Milhouse flavor. Manually-set maps override whatever the Substance TOP supplies, so you can mix and match.
Why the Environment Light isn’t optional
This took me a while to learn. In PBR, metals have no diffuse color at all. A metal is basically a tinted mirror. So if you crank Metallic to 1 in a scene with one little light and no environment, you get a tiny highlight and a whole lot of near-black. It looks broken. It isn’t. It’s a mirror in an empty room.
The Environment Light fills the room. It’s a light with no position, it wraps around your whole scene, and the image you feed it (the environment map) is the light source. That’s the trick: the HDRI isn’t a background, it’s the light. And since the Environment Light has no position, dragging its rotate parameter moves your entire lighting rig.
A couple of practical HDRI notes:
- Get unclipped HDRIs (everything on Poly Haven is). A clipped HDRI stores the sun at the same brightness as a white wall, so your lighting comes out flat and disappointing no matter how good your materials are. If you ever download a random HDRI and your render looks worse than the tutorial, this is very likely why.
- For lighting a character, 2K resolution is plenty. The map gets blurred into diffuse lighting and reflections anyway, a 16K HDRI is just wasted VRAM unless it’s also your visible background.
Gotchas that will eat your life
- The Deform page. If you rebuild a material on an animated character and suddenly Milhouse freezes in a T-pose while his skeleton dances on without him, you forgot to turn on Deform on the new material. This is the single most likely thing to go wrong.
- Bumps that look like dents. If your Substance material’s surface detail reads inside-out, hit Invert Normal Map on the Substance TOP.
- Re-exported your FBX and nothing changed? TouchDesigner caches imported FBX geometry. Pulse the Import parameter on the FBX node to actually re-read the file.
- Env Light Quality lives in two places. The PBR MAT’s Env Light Quality is multiplied by the Environment Light’s Environment Map Quality. Two knobs, one result. Now you know, and you can stop hunting for the “real” one.
- Reusing the FBX’s color map works great on a cartoon character, but know that an old-style diffuse map often has lighting and shadow baked in, which PBR base color isn’t supposed to have. Fine for Milhouse, wrong for photorealism.
Get the goods: assets to download
Everything you need to follow along, free:
- Poly Haven - HDRIs for your Environment Light. CC0, unclipped, no account needed. The default answer.
- ambientCG - free
.sbsarSubstance materials (plus HDRIs and regular texture sets). All CC0. One-stop shop for materials and lighting. - Adobe Substance 3D Community Assets - free community
.sbsarfiles with a free Adobe account. Check individual asset licenses. - Mixamo - free rigged, animated characters as FBX. Upload your own model and it auto-rigs it, then pick from a big library of mocap animations.
- Quaternius / Poly Pizza - CC0 low-poly character packs, many rigged and animated.
- Kenney - thousands of CC0 game assets, great for filler geometry.
- Sketchfab - a huge library of free downloadable models. Filter by Downloadable and check the license. Most are CC-BY, which just means credit the creator.
Learn more
TouchDesigner docs for everything in this tutorial:
- FBX COMP · Import Select SOP
- PBR MAT · Phong MAT
- Substance TOP · Substance Select TOP
- Environment Light COMP · PreFilter Map TOP
- Deforming Geometry (Skinning) · Normal Mapping
Going deeper on PBR:
- LearnOpenGL: PBR Theory - the most readable free introduction
- Adobe: The PBR Guide - the artist-facing explanation of metal/rough
- Physically Based Rendering: From Theory to Implementation - the standard reference, free online
- Karis, Real Shading in Unreal Engine 4 - the SIGGRAPH paper TouchDesigner’s own PBR docs cite
Now go forth and start tweaking sliders and buttons to make your own weird and wonderful stuff!